How To Know How Much RAM You Have In Your Computer
Surprisingly, some users may not be aware of the specific amount of RAM their computer is equipped with. In this article, we aim to guide you through the process of checking your computer’s RAM capacity.
Before delving into the practical steps, let’s first provide a brief overview of what RAM entails.
What Is RAM?
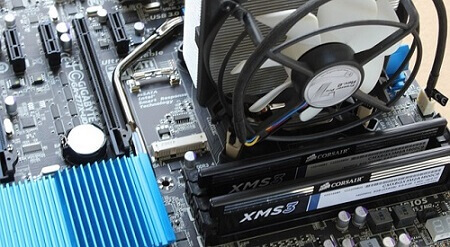
The term ‘RAM’ stands for ‘Random Access Memory,’ a type of high-speed storage utilized by your computer to temporarily hold data.
Distinguished from ROM, which retains data until deletion, RAM’s function is pivotal in ensuring that your computer can efficiently manage multiple tasks simultaneously without succumbing to sluggishness or slowdowns.
In the contemporary tech landscape, it’s worth noting that many laptop computers have their RAM soldered onto the motherboards.
This design choice limits the upgradeability of the RAM; consequently, if a user desires increased RAM capacity, acquiring a new machine with a larger RAM becomes the only viable option.
In contrast, desktop computers do not face the same restriction, as their RAM modules are not soldered in. This grants users the flexibility to augment their RAM as needed.
The process involves acquiring a compatible memory stick and installing it in the desktop.
Before investing in a new memory stick, often priced at over GHS 300, it’s prudent to assess whether your machine genuinely requires an upgrade.
A careful evaluation may reveal that the existing RAM suffices, or prompt consideration of other enhancements such as an SSD.
Continue reading to learn how to ascertain the size of the RAM currently installed on your computer.
How To Check Your RAM On Windows 10
For Windows 10 users, checking the installed RAM on your machine is a straightforward process. Simply follow these steps:
- Navigate to ‘Settings.’
- Within the ‘Settings’ menu, select ‘System.’
- From the ‘System’ menu, choose ‘About.’
- Locate the ‘Device specifications’ section.
- In this section, find the line labeled ‘Installed RAM.’
This line will provide you with information about the amount of RAM your machine is currently running.
This quick and accessible method allows you to assess your computer’s RAM configuration without the need for third-party applications or complex procedures.
Checking Your RAM On Windows 7
For users still operating on the outdated Windows 7 operating system, considering an upgrade is advisable as Microsoft has discontinued support for this OS. To check the amount of RAM on your computer, follow these simple steps:
- Right-click on “My Computer.”
- Choose the option labeled “Properties.”
Under the ‘System’ section, you will find information about the amount of RAM installed on your computer. This direct method allows you to quickly assess your system’s RAM without the need for additional tools or complex procedures.
Checking The RAM On The Mac
For Mac users, checking the amount of RAM on your machine is a straightforward process. Here’s how you can do it:
- Click on the Apple logo located in the upper left corner of the display.
- Select “About This Mac.”
A window will appear, presenting a simple list of your machine’s specifications, including the current amount of RAM.
In today’s computing landscape, a RAM capacity of 4GB is considered insufficient due to the advancing nature of computers and their applications.
Ideally, a RAM size of 16GB and above is recommended for optimal performance.
If you observe that your Mac is experiencing slowdowns, you can access the Windows Task Manager equivalent by pressing Ctrl+Shift+Esc.
This will bring up the Task Manager, and by navigating to the ‘Performance’ tab, you can assess the current usage of your computer’s resources.
Conclusion
Unfortunately, modern Macs do not feature upgradeable RAM. In such cases, if you find your Mac slowing down, the prospect of acquiring a new Mac may be worth considering.
To monitor the active memory usage on your Mac and identify potential performance issues, follow these steps:
- Press Command + Space to invoke Spotlight.
- Type in ‘Activity Monitor’ and press ‘Enter’ to open it.
Within the Activity Monitor window, click on the ‘Memory’ tab at the top. Here, you’ll find a graphical representation indicating the amount of RAM in use at that specific moment.
This allows you to gain insights into your Mac’s real-time memory utilization, aiding in troubleshooting and performance optimization.


